How to set up a singular Air 4920 access point from AirTies as a Wi-Fi repeater in your home.
What a Wireless Repeater Can Do
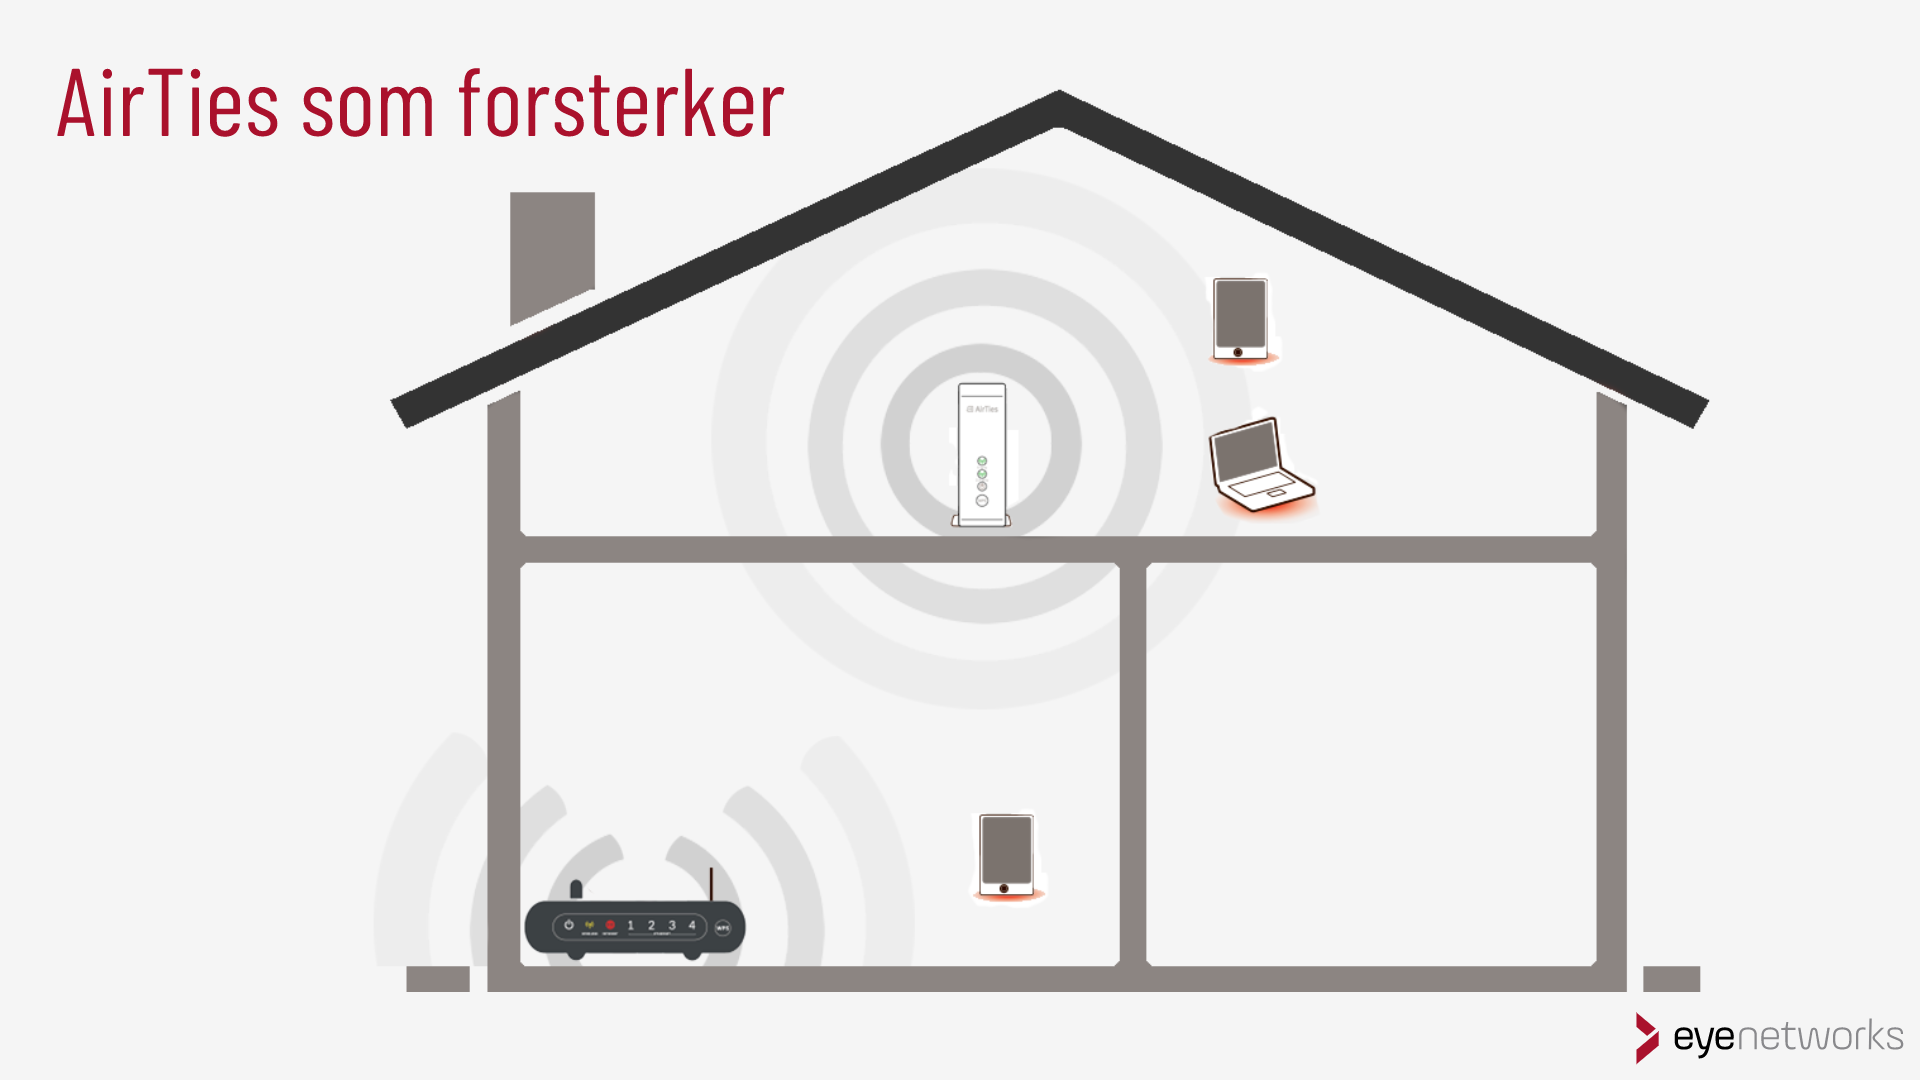
The AirTies Air 4920 can be set up as a repeater (also called Wi-Fi extender or amplifier). You can use this to extend your coverage in one part of your home where the signal is weak or missing.
Note: This functionality is not available in the Air 4930.
If you have multiple dead zones or want full coverage in your home with stable performance, we advice you to go with the AirTies Smart Wi-Fi home pack instead of a repeater.
We also advise against setting up more than one repeater in your home.
Important: Do not split up home packs!

The devices included in an AirTies home pack are set up to be in the same mesh network and will not work as repeaters.
How to Set up the AirTies Air 4920 as a Repeater
Before You Start
Find the place in your home where you want to extend your coverage.
Take care to select a location where the repeater itself receives a strong signal from the router!
This is one of the most common mistakes made with wireless amplifiers.
An amplifier that has a weak signal from the router will provide poor performance and can disrupt everyone on the network.
Setting up the Air 4920 as a Repeater Using WPS
- Unpack the device and remove all the protective plastic.
- Connect the access point to power and turn it on. Wait until the power symbol is solid white and the network indicators flash green.
This will normally take three minutes. - On your router: Find and activate WPS.
- Hold the WPS button for two seconds.
- On some devices, you must log in and start WPS from the web interface. It can also be called PBC, which stands for “push-button connect”.
- On the Air 4920: Hold the WPS button on the front of the device for 2 seconds. The device will now connect to the router and copy its network name/SSID and password from the 5 Ghz network.
- After pairing, wait for about 30 seconds for both the router and the repeater to come online.
Should you later change the SSID or password on the router, you will need to repeat this setup as described above.
If you cannot find WPS on your router or the above procedure does not work:
Setting up Air 4920 as a Repeater Using air4920.local
- Unpack the device and remove all the protective plastic.
- Connect the access point to power and turn it on. Wait until the power symbol is solid white and the network indicators flash green.
This will normally take three minutes. - Connect your device to a laptop with the supplied Ethernet cable.
- In the browser (Chrome, Firefox, Microsoft Edge or similar), go to the address http://air4920.local
- Klikk på fanen Repeater og følg instruksjonene. Merk også:
- When you see the list of available wireless networks, make sure the repeater gets a good signal from the router. If the coverage is poor where you placed the repeater, you will need to find a better location for it.
- If you are seeing two local networks (one for 5 GHz and one for 2.4 GHz), select 5 GHz. Log on to the network with a password.
- Wait for about 30 seconds after pairing for the router and repeater to come online.
The AirTies device has now copied the network name/SSID and password from the router.
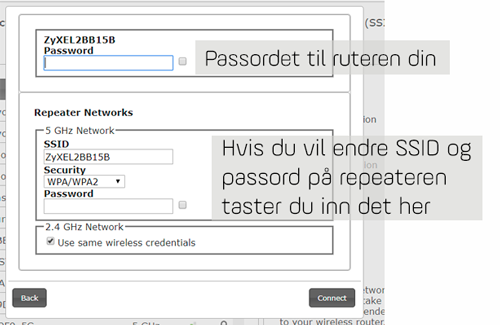
If instead you want your repeater to have a separate network name, you can click Advanced and change the SSID and password there as seen in the below screenshot:

Should you later change the SSID or password on the router, you will need to repeat this setup as described above.
