This is how you set up IPv6 in pfSense when you have a cable modem from Telia. Applies to Netgate SG-1100 and other devices with corresponding pfSense version.
Telia is now offering IPv6 to its customers — contact their customer support for access and setup information.
This article covers what you need to do if you want to use a Netgate 1100, 2100, 3100 or other device with pfSense software with IPv6 and have a cable modem from Telia. If you are a fiber customer, we recommend a look at this blog article from Tore Anderson .
What is pfSense?
pfSense is a firewall/router software distribution based on the FreeBSD operating system. FreeBSD is free software, developed by collaborative volunteers around the world since the 1990s.
You can buy your own hardware with pfSense already installed, for example the super compact Netgate 1100, which we sell here at Eye Networks:
Telecom companies can order directly from us – contact sales@eyenetworks.no
Other companies and private individuals can buy via dinwifi.no
You can also install pfSense on your own hardware. If you are a new user of pfSense, you will find a Getting Started guide at pfsense.org .
Set Up The Cable Modem
Regardless of the hardware platform, in general for pfSense to work with IPv4 or IPv6, you need the cable modem from Telia to be in bridge mode. Telia has instructions for this.
Set Up pfSense
Note: This procedure requires the pfSense software to be version 2.4.4 or later.
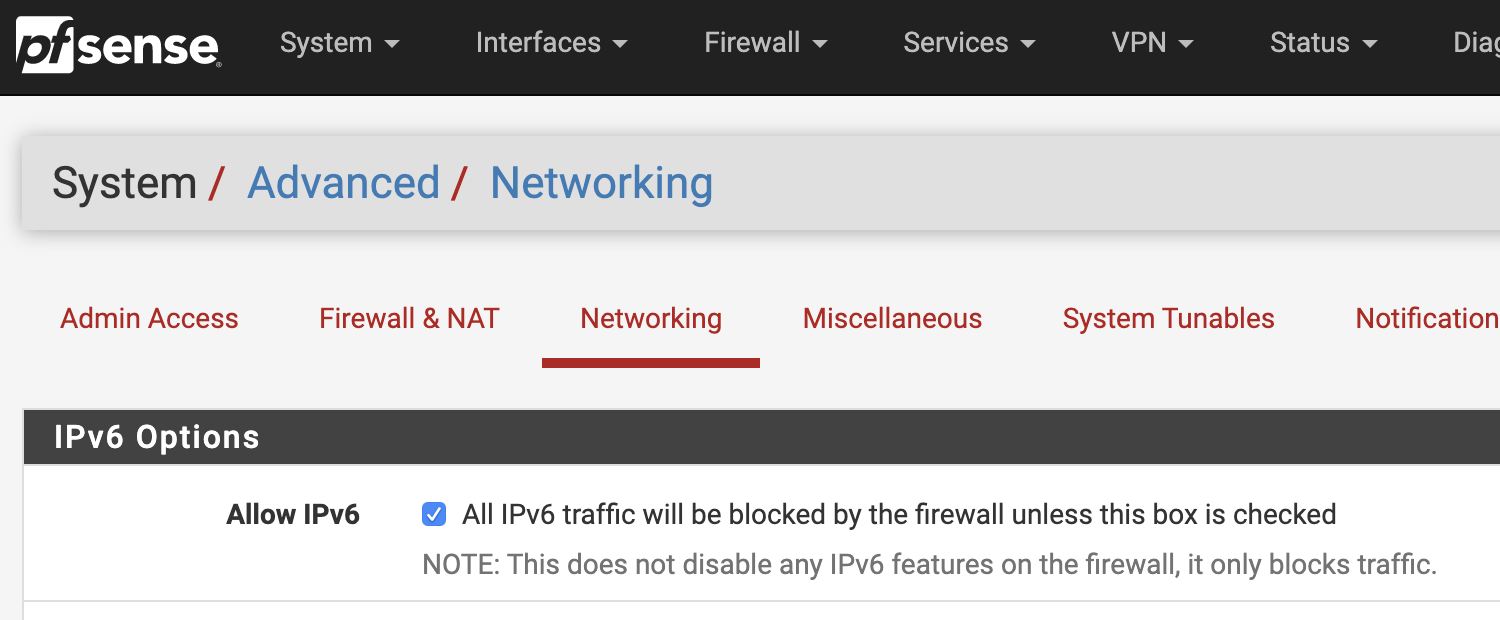
- Log in to your pfSense device and go to System > Advanced > Networking
- Select the check box that says All IPv6 traffic will be blocked by the firewall unless this box is checked
- Scroll down and click Save.
WAN
- Go to Interfaces > WAN .
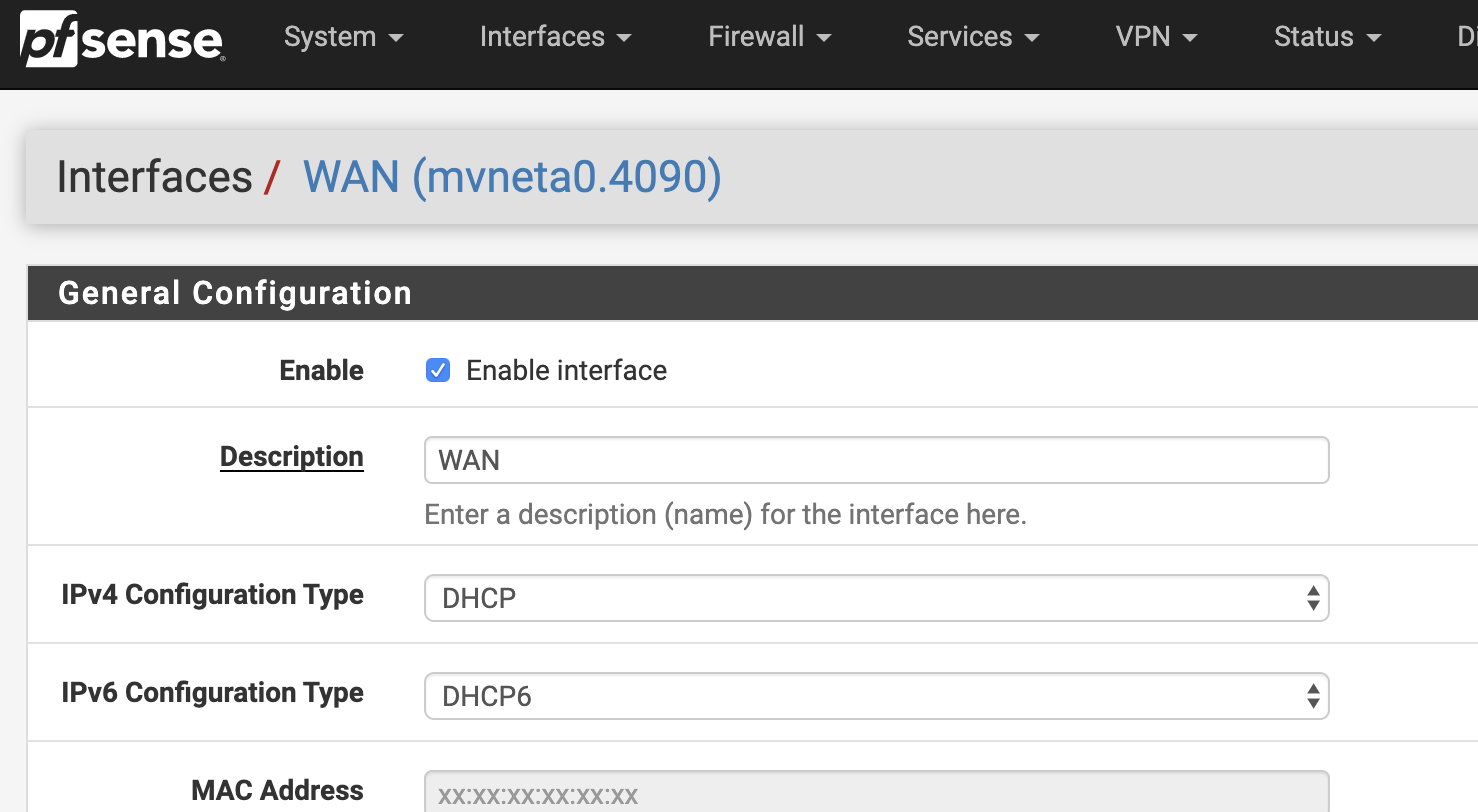
- Under IPv6 Configuration Type, select DHCP6 from the drop-down menu.
- Under DHCPv6 Prefix Delegation size, select 60 from the drop-down menu.
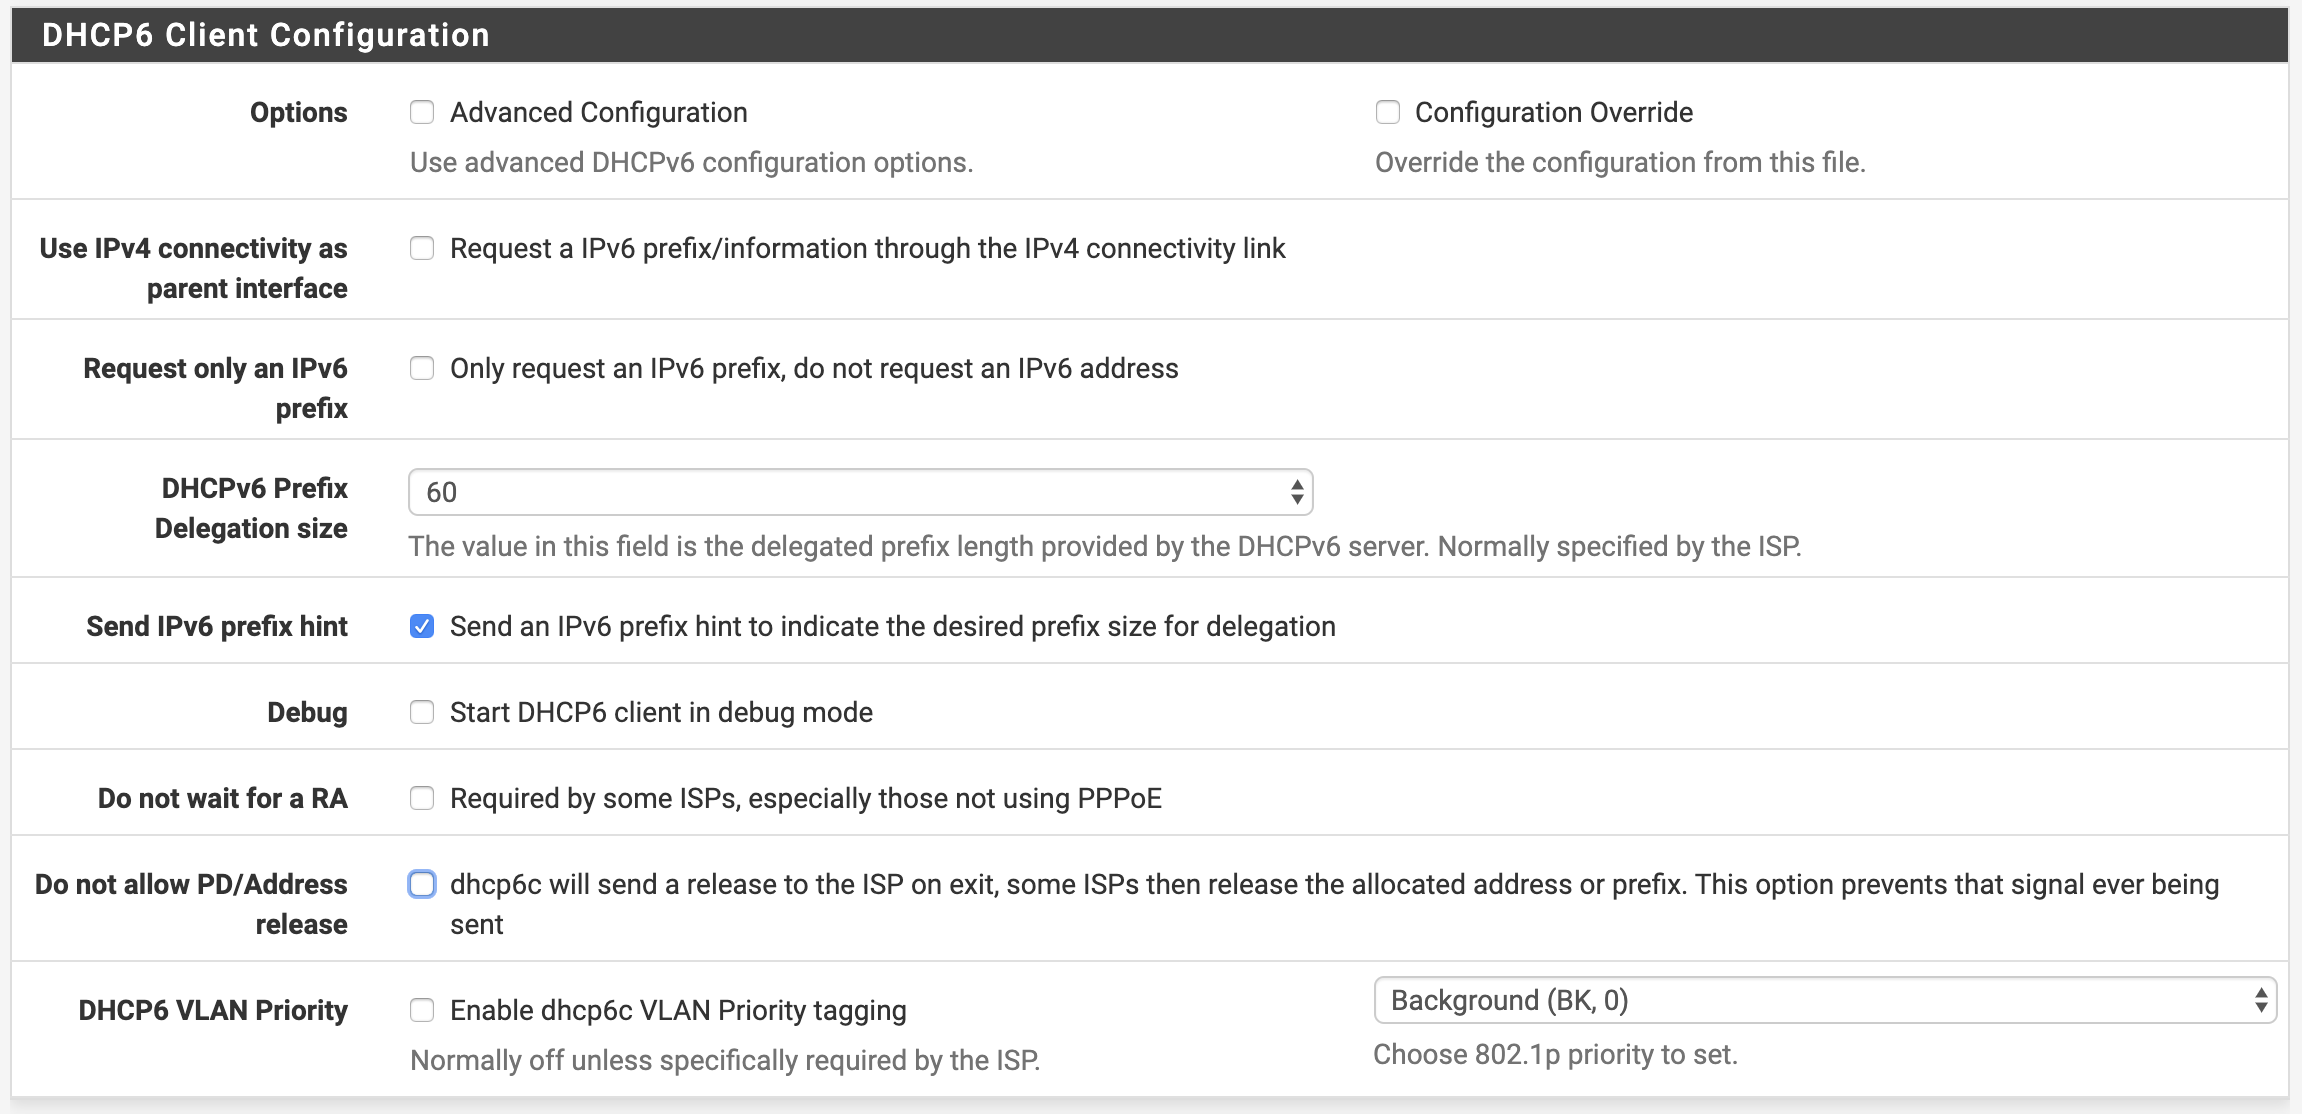
- Select the checkbox that says Send IPv6 prefix hint.
- Scroll down and press Save. After a few seconds this image will appear.

- Tap Apply Changes. You should now get an IPv6 address assigned to the WAN interface, as well as a /60 PD for use on the LAN.
LAN
- Go to Interfaces > LAN.
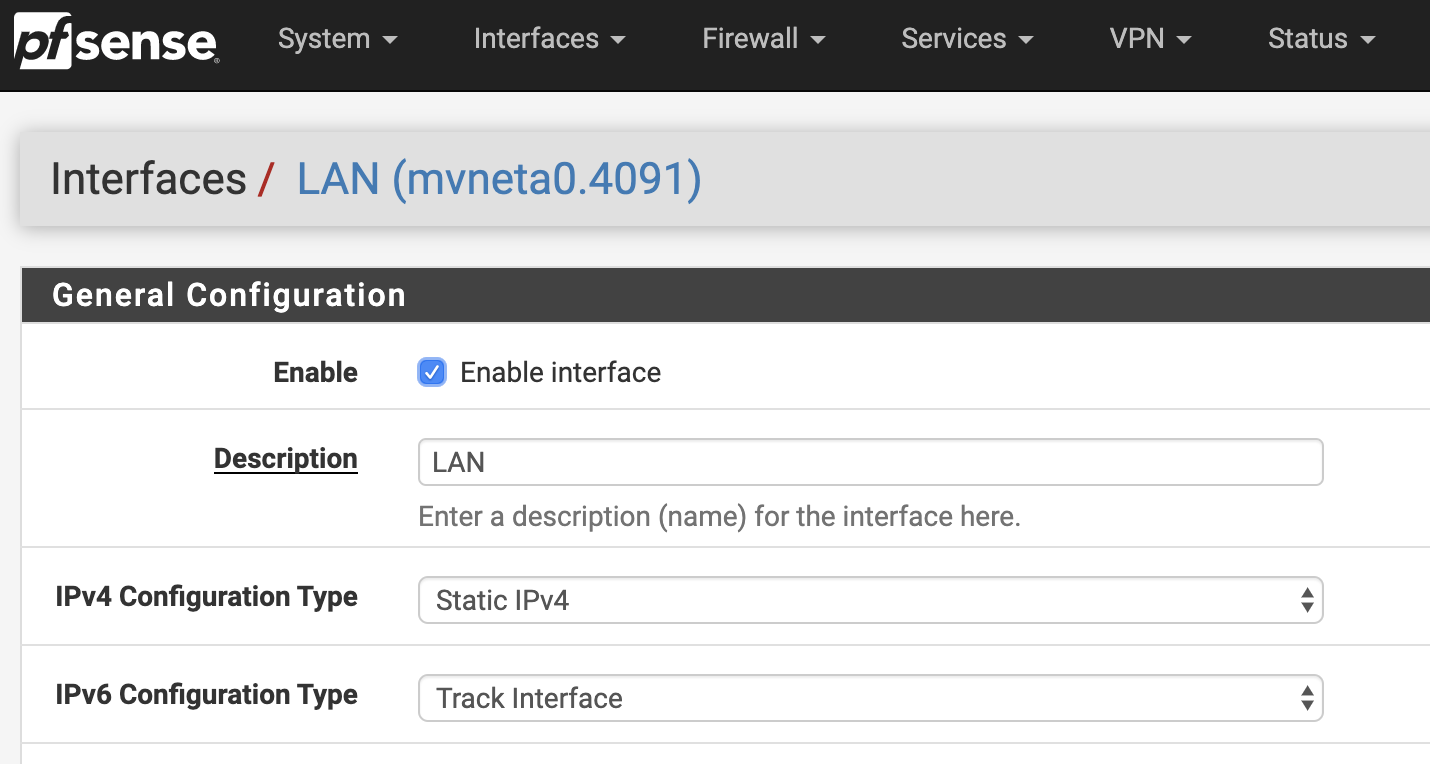
- Under IPv6 Configuration Type, select Track Interface from the drop-down menu.
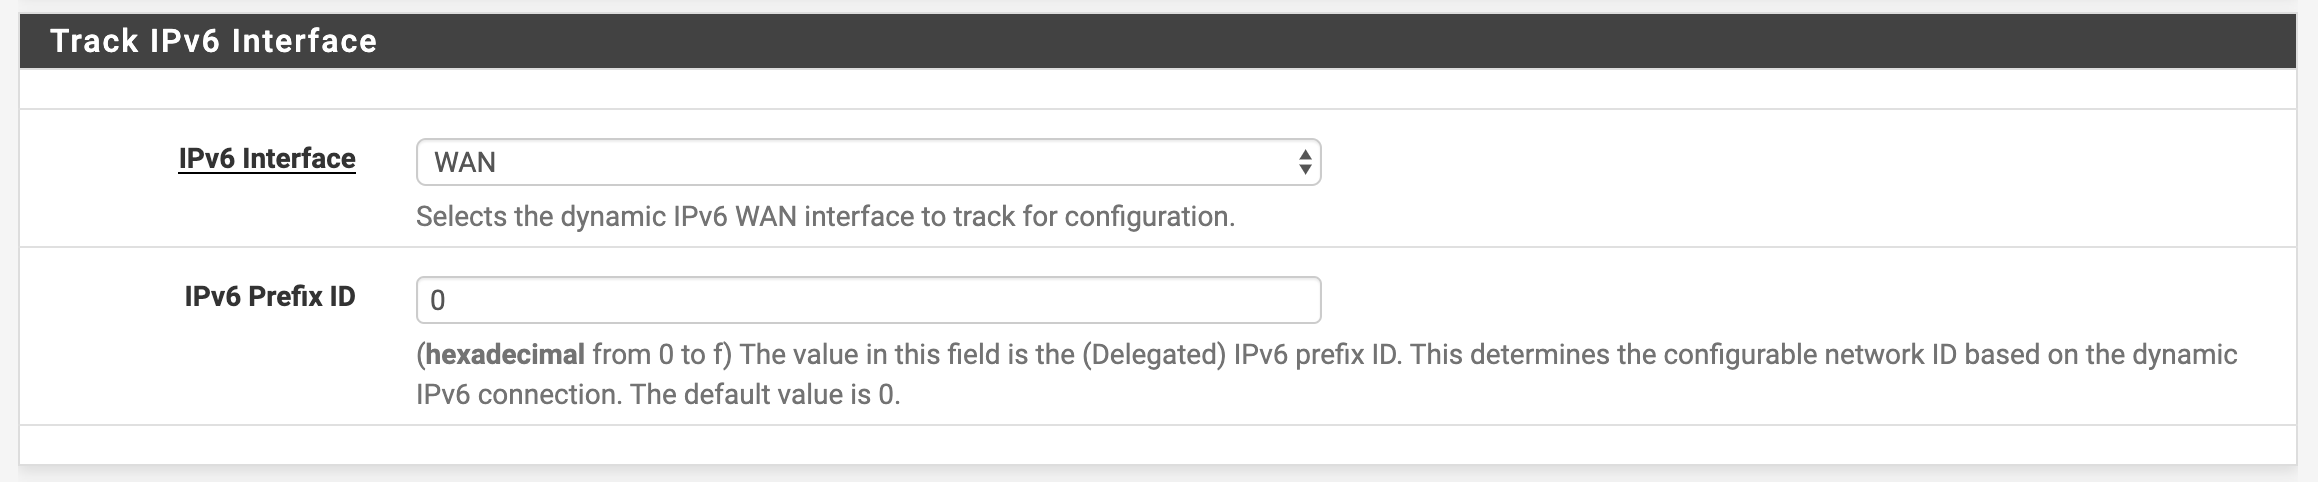
- In the Track IPv6 Interface section, find the IPv6 Interface setting and select WAN from the drop-down menu.
- Scroll down and click Save. After a few seconds, you will get the next choice.
- Click Apply Changes.
LAN DHCPv6 and RA
There are too many scenarios for using IPv6 on your own LAN to cover them all in a simple guide like this, but this is how you get started with assigning IPv6 addresses to devices on your LAN:
- Go to Services > DHCPv6 Server & RA > DHCPv6 Server .
- Select the checkbox Enable DHCPv6 server for LAN interface. Other settings can be left as default.
- Scroll down and press Save.
- Go to Service > DHCPv6 Server & RA > Router Advertisements
- Under Router Mode, select Assisted from the drop-down menu.
- Under DNS Configuration, select the Settings check box.
- Press Save.
The pfSense setup is now complete! The next step is to make sure that clients are configured to accept IPv6 addresses.
More Things You Can Do
- Configure dynamic DNS client for IPv6, there are several providers that support this. We have used Cloudflare’s solution with our pfSense installations.
- Configure DNS with names from DHCP clients.
- IPv6 VPN connections.
- Install IPvFoo or similar extensions in the browser, to more easily see whether you are on an IPv6 or IPv4 page.

- Go to https://test-ipv6.com/ to see how high an IPv6 score you get.
Article by Jan Pedro Tumusok